
I squeezed in a quick up cycle on my last day before returning to work after an enjoyable & productive summer break. I turned the Beauty’s ratty old goth style footstool into a tempting tactile toadstool. What’s more, I didn’t spend a penny, since the big clear out I am trying hard to use what I have.
Footstool Makeover
The footstool started life as a black goth-emo style footstool holding Kerang magazine later to be replaced by vogue mags. Either way it’s services were no longer required by the Beauty. I made her a nifty bespoke bed pocket specifically to meet her needs as a trade off. I think Her Bagesty was a bit miffed as she occasionally lounges on there when addressing her humble followers. (She left a collection of cat hairs for me to remove too.)
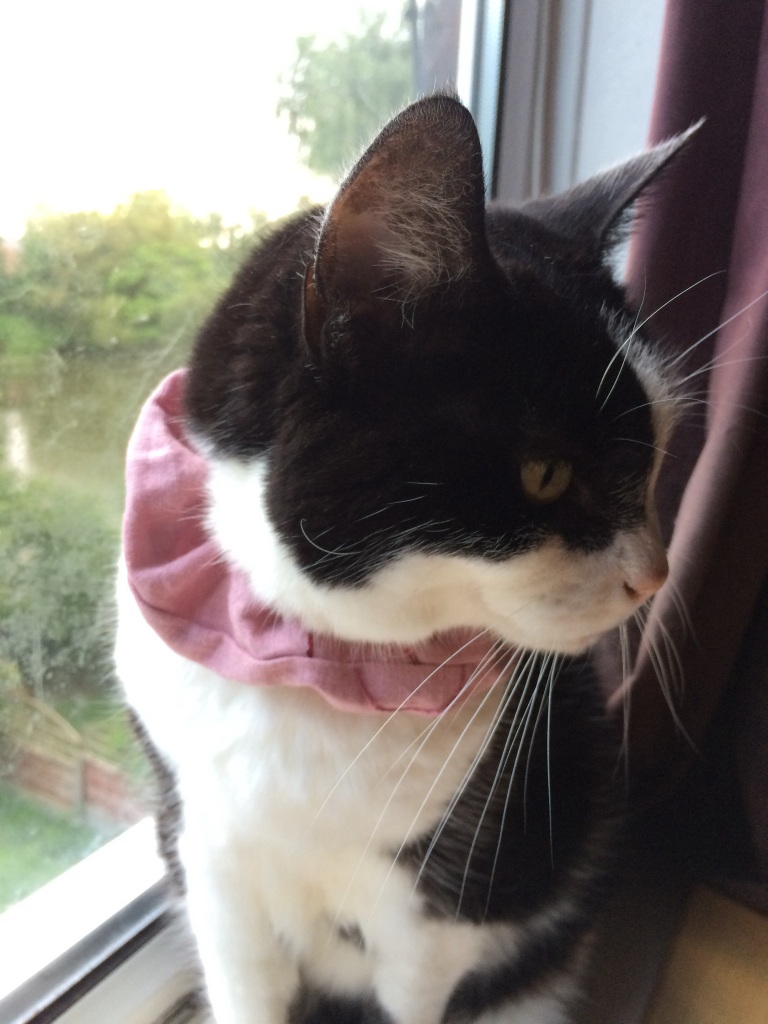
Her Bajesty (Badger the Cat) regally relaxing
I eagerly fished out my tool kit ( a bradawl, a staple remover & a screw driver) and removed the dark cloak of miserable mystery.
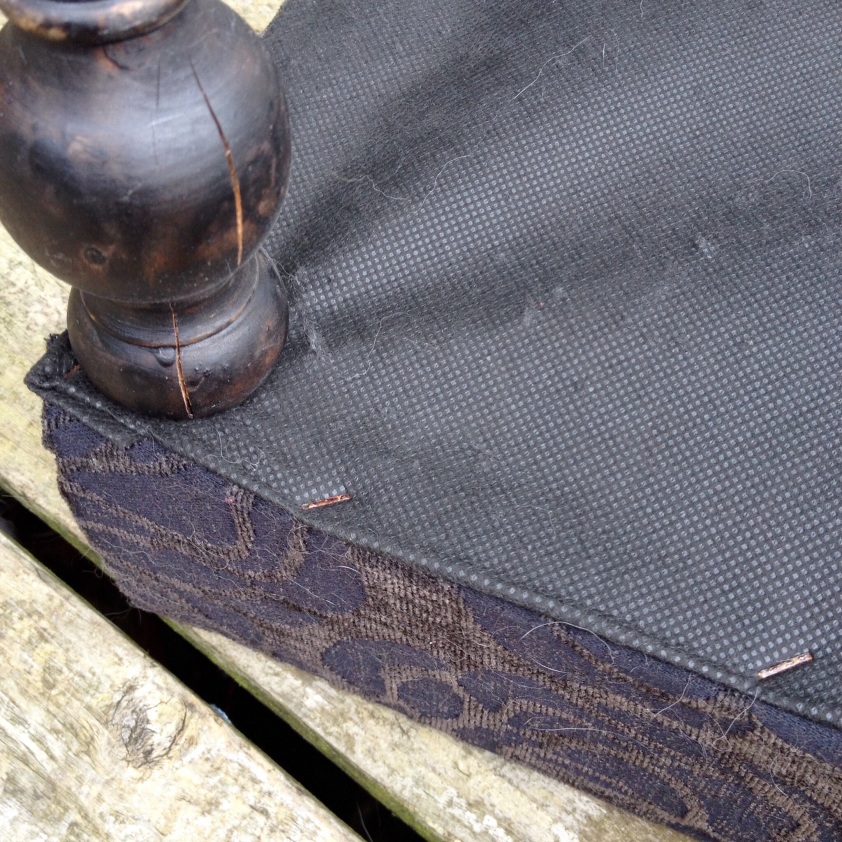
Shedding the cloak of darkness
Next, my trusty chalk pain earnt its keep once again – such good value, it’s everlasting! I didn’t use the lilac/pink paint (as seen on the Sewing Throne & Bubble Quilt Chair) as I wanted some contrast so mixed a dash of white with duck egg blue for a pale aqua colour.
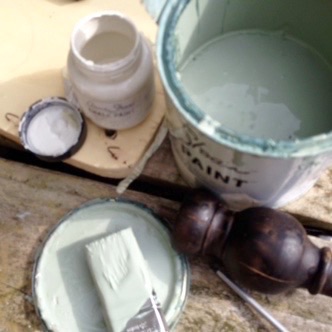
A fresh lick of paint
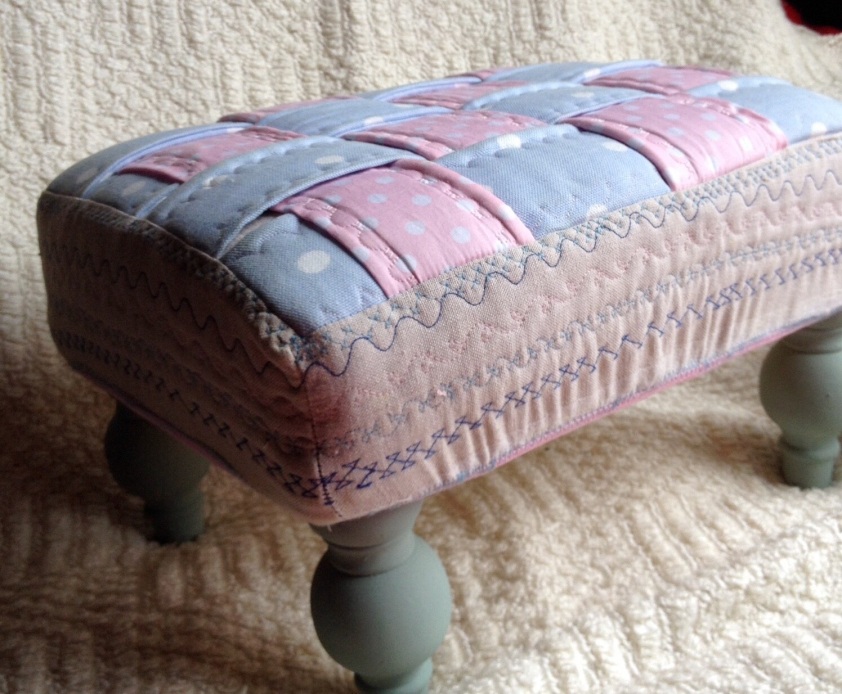
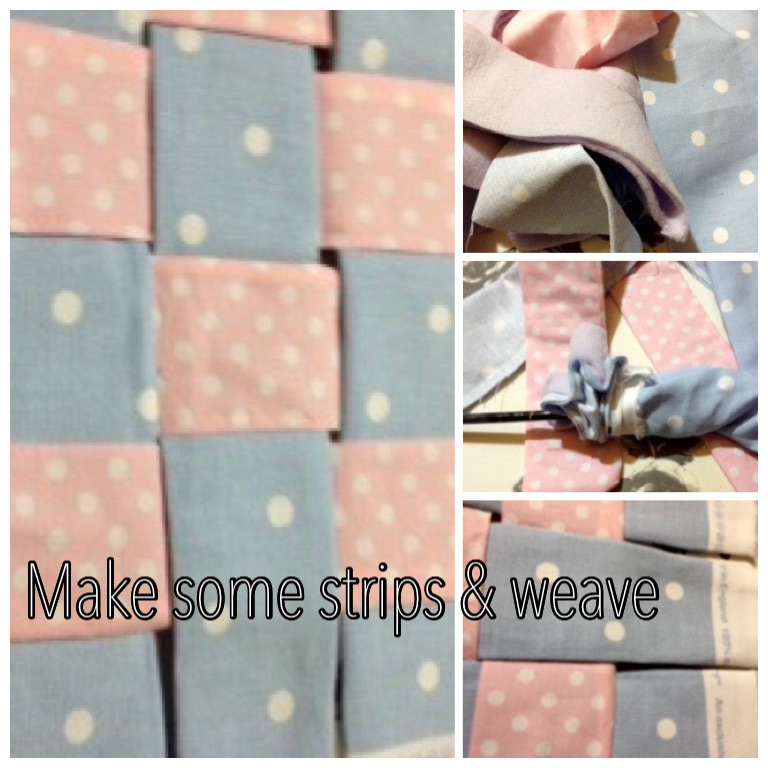
I found some pink & blue polka dot fabric in my stash that sort of reminded me of Dolly Mixtures. Very appropriate, turn this festering footstool into a fairy chair with sweetie style fabric! I also carved up an old linen dress that I no longer wear to use for the sides and the everlasting lilac fleece that i used to plump up Matilda for padding.
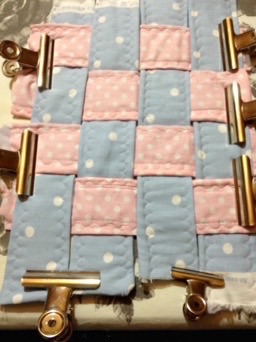
I made four strips of each fabric sandwiching the fleece in between, wrong sides together. I ‘weaved’ the fabric strips like a basket (after I had turned it out & pressed it) then added a bit of machine stitching wizardry.
I ran a border of stitching around the perimeter, keeping it all in place with bull-dog clips, pin or tack before sewing. Or risk your needles and eyes & keep the clips in, no seriously don’t they would wiggle about anyway.
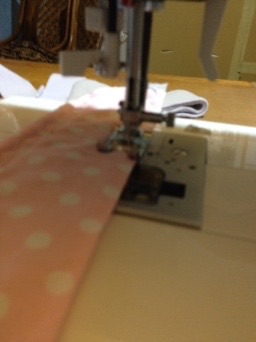
Add fancy pants stitching as desired
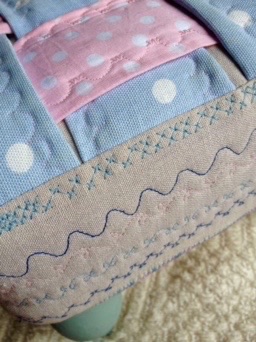
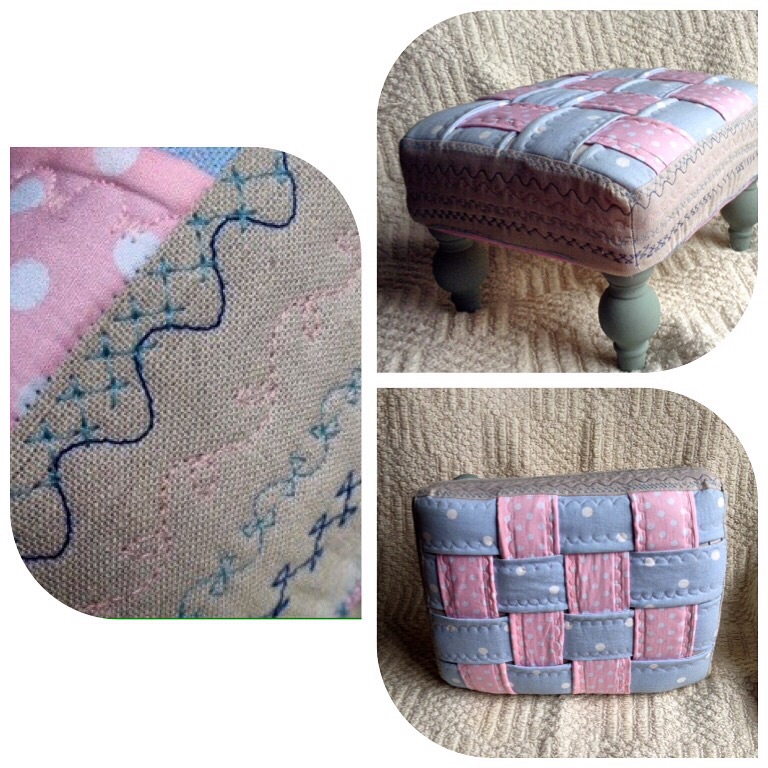
The side panels were also embroidered, after sandwiching fleece between each of the four pieces. I used this bit as an opportunity to create a sampler, the stool will live in my sewing Lofthouse so I have a handy stitch reference.
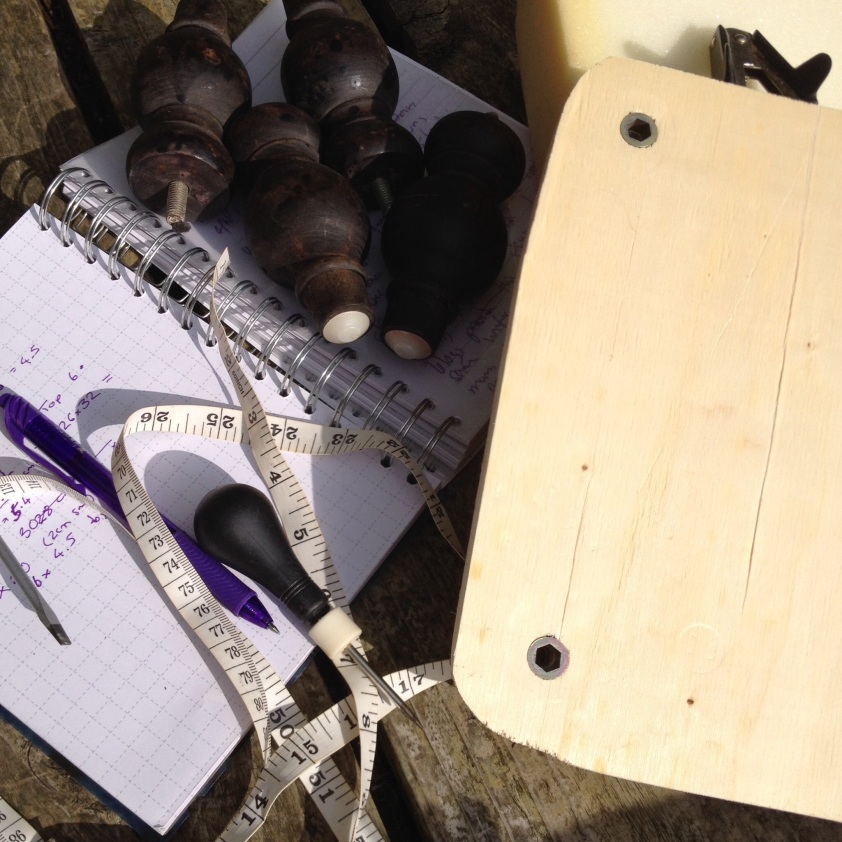
I used the base piece of wood as a template to make a backing for the basket weave top and basted it to it. I then joined the four side panels at the short seams, making a rectangle without a top or bottom. The rectangle & top piece were joined in one continuous sew, pivoting at the corners. I reinforced the edge with interfacing added elastic around the bottom, stretching it as I sewed.
Next, pull it over the foam & wooden base, screw the legs on catching the corners tugging it into shape. You could staple or use upholstery tacks but as its pastel shades I wanted mine to be removable for washing.
Trim, snip, press & finish seams as you go using your preferred method, I am still punishing Mr Grey (my overlocker), I dusted his cover yesterday!
Ta Da, an enchanted, enticing perch perfect for pondering!
From festering footstool to fairy toadstool
Footstool Makeover
I have a largish wooden storage box to apply my wizardry to next, I will use the basket weaving quilting technique again on it.
